Making lingerie for a ball-jointed doll | TUTORIAL
One of the most exciting parts of doll making for me is costumes. Making intricate garments, embroidering, adding lace and beads - the possibilities are endless! Today I want to walk you through the process of making a very cute lingerie set for one of my latest dolls.
This post contains affiliate links and I will be compensated if you make a purchase after clicking on my links. I wouldn’t promote anything I don’t absolutely love!
What WILL YOU need
Measuring tape - to measure your doll for sewing patterns.
Fabric - I've chosen a very thin slightly stretchy synthetic fabric.
Lace, beads - for lingerie decoration.
Narrow ribbon - for straps.
Thin wire, thin nylon string (optional) - to hold the shape of the bra.
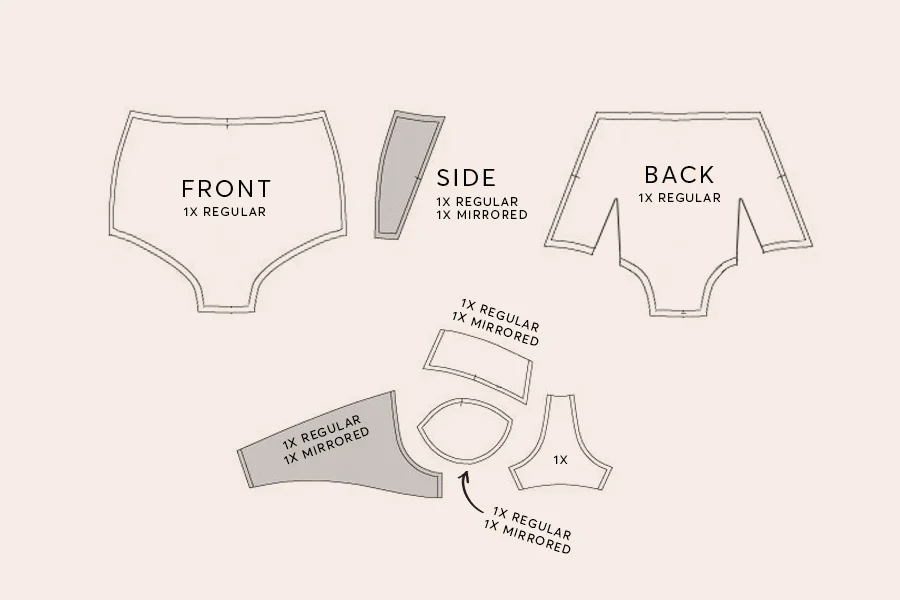
Pattern
I'm using the pattern with slight modification, that I've found on Pinterest.
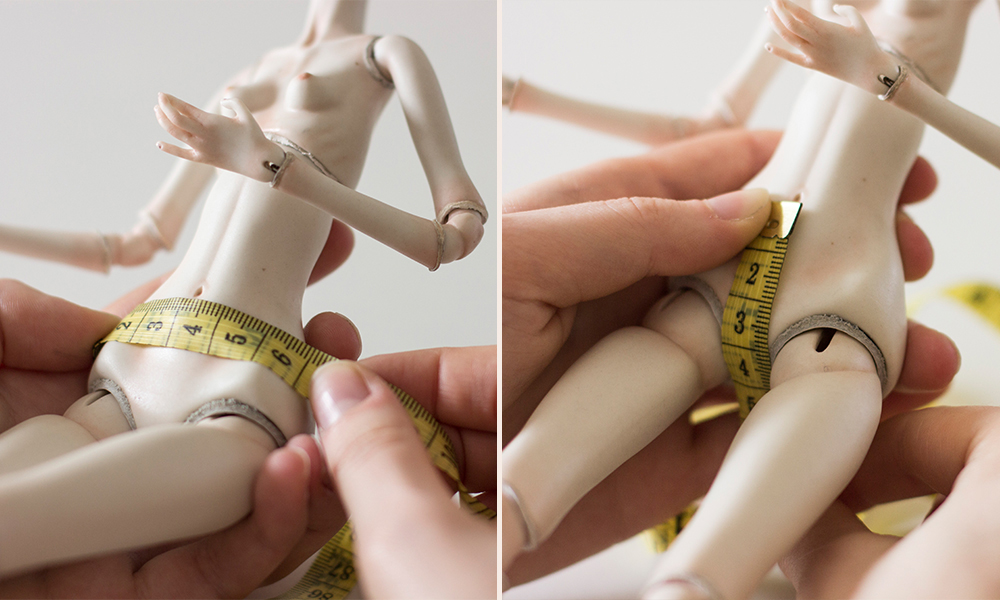
To adjust the pattern to fit your doll, measure the doll with measuring tape and alter the width or length of the parts.
Front and back measuring for width and length.
Fitting the pattern
Cut the adjusted pattern out of paper and see if it fits your doll. Make further alterations if needed.
Cutting the fabric
When the pattern fits perfectly, cut the parts out of fabric.
Sewing the bottoms
Connect and stitch up the darts (small cuttings in the back pattern) to create a rounded shape for the back part before sewing all the parts together.
Fold and stitch the edges of every part to make it neat and tidy.
Connect all the parts together leaving one side not stitched up.
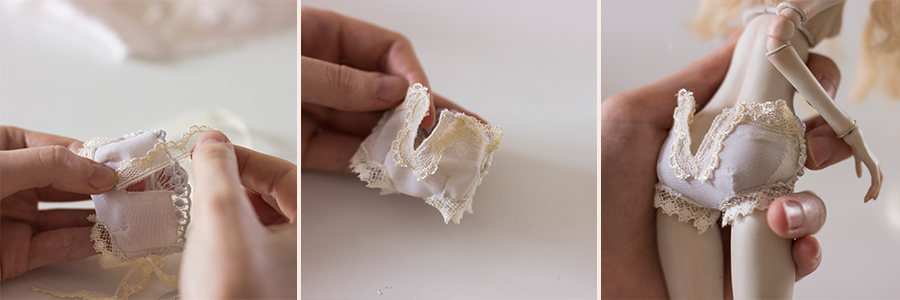
Now, this step is completely optional, but I like to decorate the edges with lace. It's easier to add lace now, while the edges are still flat and not connected together.
If your chosen fabric is stretchy, sew all the parts together and see how they fit your doll. If you've chosen not elastic one, make an incision in the back, we'll add the buttons there later.
Make adjustments if needed. When everything fits nicely it's time to move on to decorating!
Decorating
I like to use lace and beads for decorating. It's time to be creative so pick anything you like!
I'm adding lace to all the edges.
Adding buttons
Because the scale of the doll, I'm using beads and loops made from a thin string.
Finishing touches
I'm adding a few white beads and ribbons to complete the bottoms.
Fitting the pattern for the bra
Repeat the measuring steps and adjust the pattern to fit your doll. Cut it out of paper and see how it fits.
Trace the pattern on to the fabric and start sewing the pieces together.
First, I sew the middle parts together, then adding the sides. Don't forget to fold and stitch the edges to make everything neat!
Shaping
Sometimes the fabric doesn't hold the shape very well, especially if it's a thin one. I'm using thin wire and a nylon string to avoid that.
I glue the wire in the middle and suture the nylon string along the edges of the bra cups.
Decorating
I continue with the same lace and beads to decorate the bra.
Adding the clasp
You can use the same system with beads and loops or add any small clasp you like. I've chosen this transparent one. I believe you can find those at any sewing supply shop.
Adding the straps
I'm making the straps from two pieces of ribbon and jump rings to make the illusion that the straps are adjustable.
Thread the ribbon through a jump ring, burn the edges and squeeze them together. Be careful not to burn yourself! If you don't feel comfortable using fire, you can use glue instead.
Thread another part of the ribbon to the same jump ring. This time make it longer.
Attach these straps to the bra and you're done!
If you have any questions, just let me know in the comments down below. Also, don't forget to subscribe to my newsletter and get all the new articles, tutorials or news about dolls right into your inbox!


