
Sculpting a BJD from air-dry clay: first steps
I’m sculpting my second ball-jointed doll and I’ve decided to document all the process! A few years ago when I was just trying to understand how ball-jointed dolls actually work, there was almost no information about the topic. Now, people are sharing a little bit more on Instagram or Facebook groups, but it still is a very mysterious form of art. And if you want to try and sculpt a doll yourself, you’re kinda left on your own. With these posts, I hope to shed a little bit of light on the process and maybe inspire you to sculpt your own BJD!


Blueprint
Making a BJD starts with a drawing. Blueprint is the very first step in this maddening journey. Now everything is possible so your imagination can run wild. Think about how your doll should look like, make a few sketches if you want to.

When you have the image of the doll you want to achieve, it’s time to get a little bit technical. Think about how many joints your doll will have, what kind of poses the doll will be able to do? This part is very important because it’ll impact your sculpting process. Fewer joints usually mean that the doll will be more integral and will look quite a lot like the usual doll. For some people, it’s more aesthetically pleasing. But have in mind that it won’t be able to do a lot of poses and the range of movements will be limited. If you want to achieve more human-like poses, the doll needs more articulation points, also most of them will be double joints. That’s harder to achieve for first-timers, but absolutely possible!

Preparing to sculpt
Now when you have your blueprint, it’s time to gather all the materials. You can read more about the materials that I’m using here. Choose a good quality clay, it’ll be easier to sculpt and sand your doll. Have a few sculpting tools, some precise ones for detailing and some flat larger ones for bigger areas.
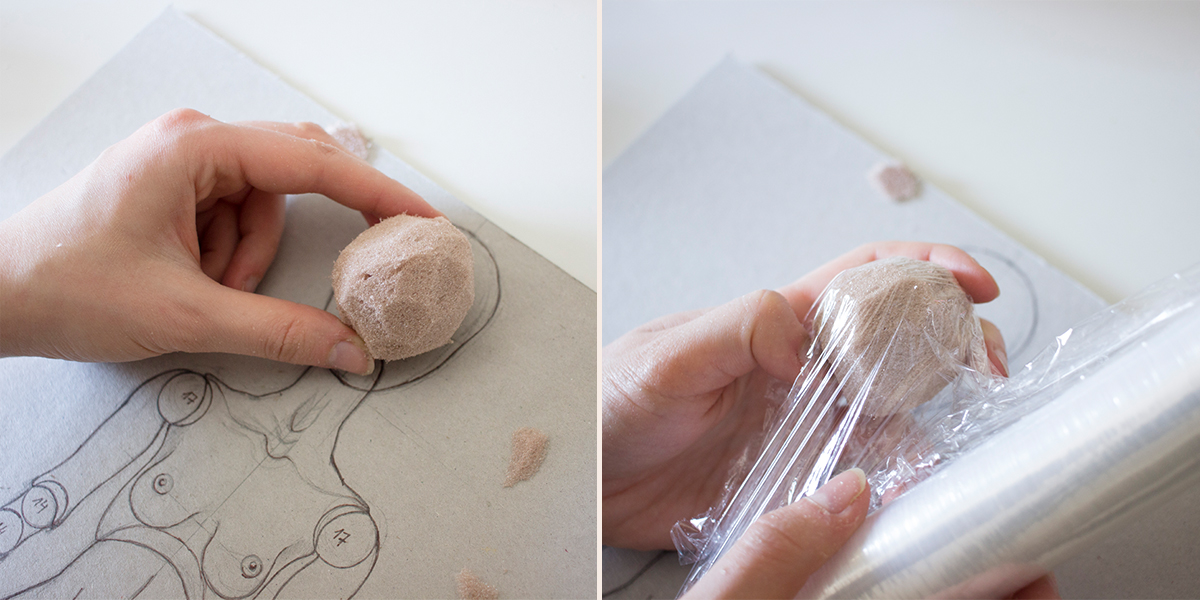
Tip: Wrap the base parts into saran wrap or plastic tape to make the removal easier.
Before sculpting I’m making a base to keep my sculpt hollow (ball-jointed dolls are hollow inside for you to string them later). I like to use styrofoam, twisted paper and plastic straws for the base. Make the base smaller than your blueprint, it doesn’t have to be very accurate because we can even all the sides while sculpting. The most important thing is to keep your sculpt hollow!
First layer of clay
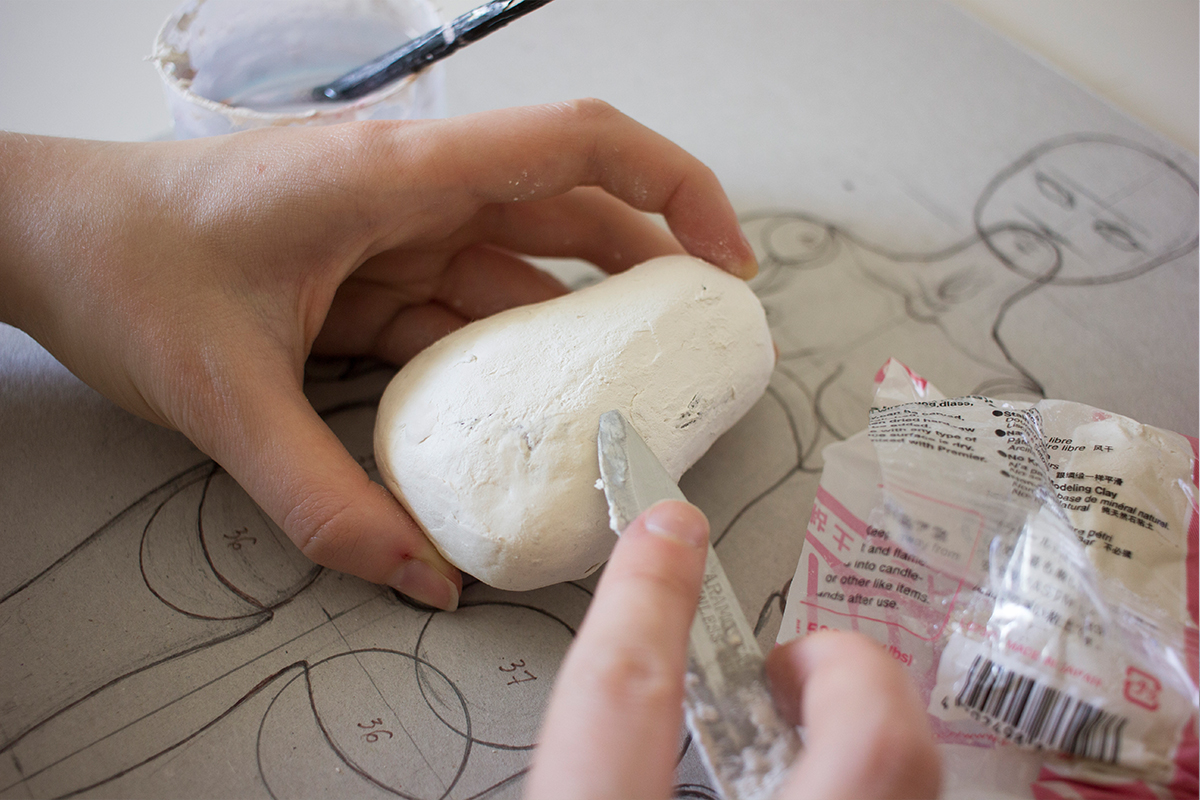
When sculpting with air-dry clays, always sculpt in layers. The clay will dry faster and you’ll avoid cracks. The first layer on the plastic wrapped base might be tricky to spread because clay doesn’t have anything to stick to. But making the first layer thin and leaving it to fully dry will make your sculpting much easier later on. Now when you’ll be adding the second layer of clay it’ll have the surface to stick on.
Removing the base
When you have quite a strong sculpt with a few layers of clay it’s time to remove the styrofoam, and paper you’ve used for the base. I usually leave the plastic straws that I’m using for the arms because they don’t really get in a way when stringing the doll. The easiest way to remove the base is to cut the parts in half, remove the styrofoam and glue the parts back together. You’ll hide the seams with a fresh layer of clay and your doll will finally be hollow. I suggest removing the styrofoam before you start detailing the body because it can damage the work you’ve already done.

I hope you’ve enjoyed reading about my first steps in sculpting ball-jointed dolls and learned something new. It’ll be quite a journey while these lumps of clay start looking like a functioning doll but I’m very excited to show you behind the scenes. Stay tuned for future articles about joints, detailing the body and putting it all together. Subscribe to my newsletter if you want to get all the news and articles right into your inbox!

How to sculpt joints for ball-jointed dolls?
It doesn’t matter if you’re just a beginner or experienced artist, the biggest hassle in BJD making is always joints! The intricate system of ball-jointed dolls that fascinates every enthusiast, collector and artist. It used to intimidate so much that I’ve postponed sculpting my first proper BJD for years. In this article, I want to unveil some of the mystery behind designing and sculpting joints for your dolls.