
How to get better at sculpting miniature features?
Since I started to create porcelain ball-jointed dolls, I’ve been fascinated with sculpting miniature features and getting them as detailed as possible. I feel like the hands, feet, facial features give so much character to the doll. But to get them right is always a challenge, especially if you sculpt on a small scale! So today, I want to share my favorite techniques for sculpting miniature features.

This post contains affiliate links and I will be compensated if you make a purchase after clicking on my links. I wouldn’t promote anything I don’t absolutely love!
ANATOMY KNOWLEDGE
It’s beneficial to seek out anatomy drawings before sculpting any part of the doll. You don’t need to know every muscle or tendon, but by having that image in mind, you’ll be able to sculpt more realistic features. And creating your doll more anatomically correct will make those miniature features even more impressive!
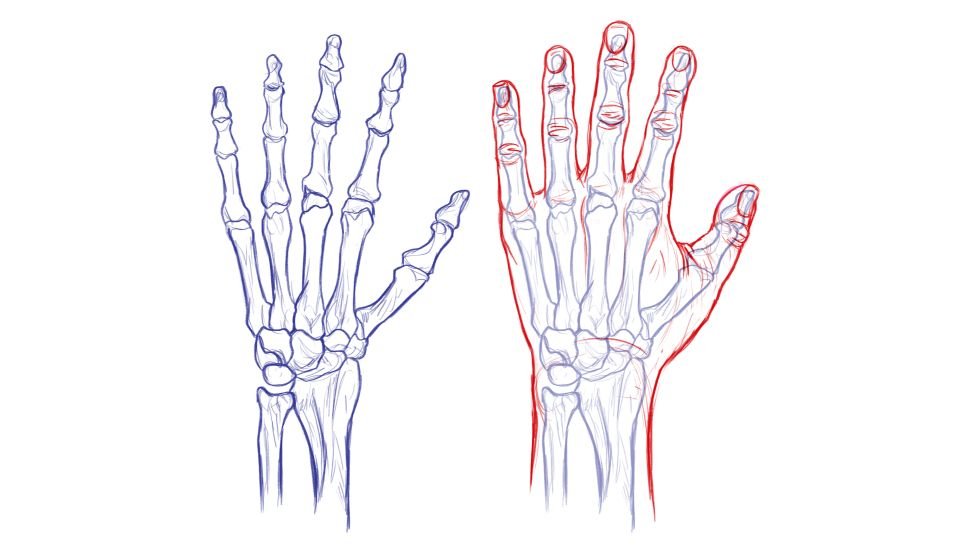
Photo from: creativebloq.com

Photo from: creativebloq.com
For example, knowing how the nails are set into the fingers, will help with detailing the hands. Knowing how to pose the hand will give your sculpture some movement and articulation.
TECHNIQUES
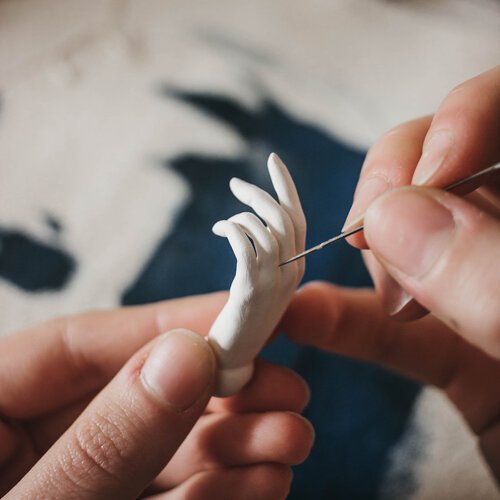
Try to explore sculpting by watching tutorials or looking at progress pictures from different artists. You will see how many different techniques are there! When sculpting with air-dry clay, I find it helpful to create a good base before detailing. For hands, it could be a wireframe that resembles a skeleton. For feet, I like to sculpt in blocks that would help me to get the shape correctly. Find what works for you and how you can manipulate clay to your advantage.


Take advantage of sculpting in layers. Air-dry clay works best when you sculpt in thin layers, wait for it to dry, and continue building the details. If you try to sculpt everything at once, most likely, you just squish the previous layers and won’t be able to create meticulous details.
CARVING
It’s my most used technique! I had to give it the whole section, haha. Carving your sculpture with a sharp pointy tool, like an X-Acto knife, will give the most control when trying to detail miniature features. When the clay has dried fully, carving can help you create very crisp and sharp details. You can look up “miniature carving” on Google to see my point! Here any sharp tool will help. I use a scalpel, a needle, and some wax carving tools.

Very soft details can be done by carving the clay after dampening the surface. Make sure your clay is dry, then take a soft brush and wet the surface. Wait a minute for the clay to soak up the water and start carving. The surface will become soft and easier to carve, allowing you to create even finer details.
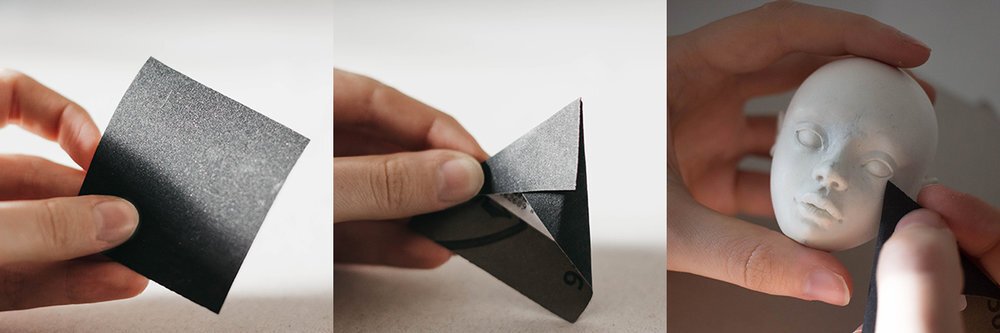
SANDING
This step is incredibly important! It’s the most tedious too. Sanding will help you to reach that very smooth finish and reveal all the elements you’ve created. Have an assortment of different sanding papers, from coarse to smooth ones. Fold the sanding paper to create a pointy tip that will get into all the crevices of miniature features.
Sculpting miniature parts of the doll require a lot of patience and dedication. Sometimes it takes me two full days to sculpt one foot! So have that in mind and make room for yourself to fail, get to know the medium, and keep sculpting. Gradually making more challenging designs is the best way to learn and protect yourself from dissapointment.

Check out my BJD sculpting masterclass for more in depth tutorials and subscribe to a newsletter, so you won’y miss any new articles!