
How to create a porcelain ball-jointed doll?
Creating a porcelain ball-jointed doll (BJD) was a dream of mine for ages! But I was so overwhelmed with the process that I couldn't do it. After a few years of doll making, practicing sculpting, learning about anatomy and mastering my skills I've finally had enough courage at least to try! Today I'm not going to walk you through each step of making a BJD, but I'll show you what it takes to create a porcelain ball-jointed doll.

This post contains affiliate links and I will be compensated if you make a purchase after clicking on my links. I wouldn’t promote anything I don’t absolutely love!
Making a prototype
You can't create a porcelain ball-jointed doll without making a prototype first. Because of my experience working with air-dry clays, I sculpted my prototype using "La Doll" clay. I know that a lot of artists use polymer clay as well but for me, it's not that forgiving as air-dry clay. With "La Doll" it's easy to smooth out the surface and even easier to sand or carve when the clay is dry.

I didn't follow any tutorials just examined other artists' creations. I didn't want to copy anyone but I was so eager to understand how everything works. Analysing the intricate details of many ball-jointed dolls I've started to sculpt my own prototype. It took me more than six months to come up with something that I was happy with.
My biggest struggles were to maintain symmetry, especially with the parts like legs and knee joints, and designing the joints. Because I've sculpted everything by hand, without using any digital designing methods or 3D printing techniques, it was quite hard to maintain the roundness of the joints and match up the sockets for them. For my next prototype, I would try using wooden beads or something similar because it would save quite a lot of time.

Making the plaster molds
This step is really long one as well. When you have your prototype ready it's time to make some plaster molds! This part is crucial if you want to create a porcelain ball-jointed doll as porcelain is a liquid substance and plaster soaks up the moisture while keeping doll parts hollow. To finish my molds' set I've worked for almost two months. I'm sure it'll be faster next time because now I'm already familiar with the process. One of the greatest challenges was to figure out how much parts one mold needs. Surfing through Pinterest and seeing how other artists solve the parting tasks was a huge help. I've spent a lot of time studying other people’s work because there are just a few tutorials on porcelain BJD dolls and not all of them are relevant to my sculpt. So I’m already on the path of doing some BJD tutorials in the future to give back my knowledge to the doll artists’ community.
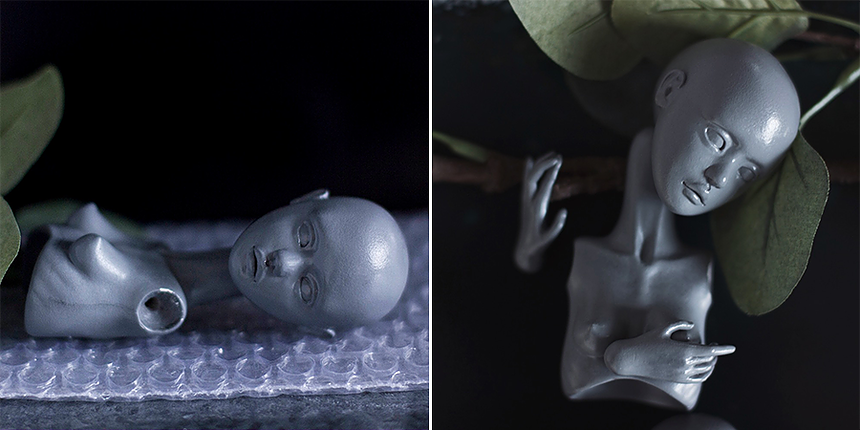
Firing the porcelain
This part was the most exciting for me. Even though I've damaged quite a few doll parts in the process it's so thrilling to finally feel and see the translucent and luxurious white porcelain. Before painting it you need to fire the porcelain two times. In doll makers community it's called soft fire and high fire mostly because the temperatures might vary depending on the porcelain brand you choose. Soft firing the raw porcelain is crucial because in this step you'll be able to remove the seams and other imperfections, sand the rough areas and perfect your doll as much as you can. At this stage, the porcelain is still quite brittle. But it's really nice to avoid the dust and sand it with water!

When your soft fired pieces are perfect it's time for a high fire! At this stage, the porcelain matures completely and becomes hard and beautifully translucent. At first, I ruined a few pieces at the kiln. Some of them deformed in the firing process, some chipped or developed strange black specs. It's best to make more doll parts than you actually need in case something goes wrong.
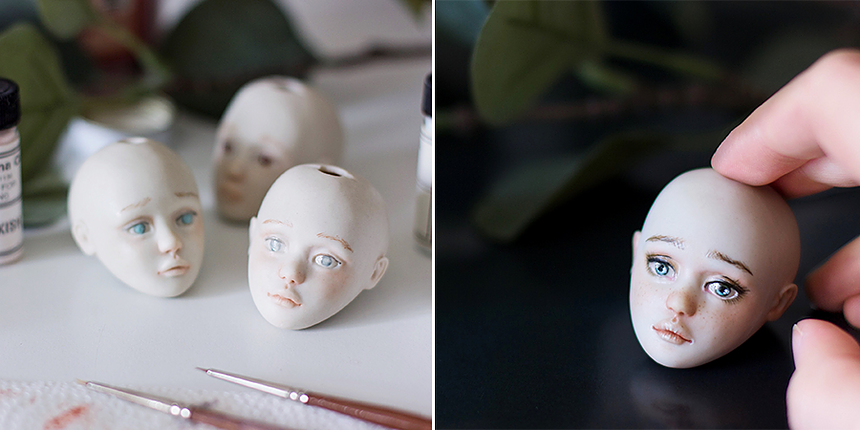
Painting the porcelain
I like when the dolls are unglazed and velvety matte so I'm using the glaze just for the eyes. To paint a porcelain doll you'll need china paints. It takes lots of layers to achieve bright colours and maintain the translucency of the porcelain. Each layer has to be fired in the kiln, so it's a lot of work! Some dolls might need 6-8 layers of china paint. But it's so rewarding to see that after each layer the doll looks more and more alive.
Stringing the doll
Ball jointed dolls usually are stringed with elastics or steel springs. It's quite an elaborate process and needs a few days of trial and error to find the perfect combination of tension and structure that your doll needs. Because everyone's dolls are different there is no universal mechanism that would work. You need to try out different springs, hooks and swivels to find what works best for YOUR doll. Because of the leather lining for the joints and strong steel springs, porcelain dolls pose beautifully! They can hold different poses and don't loose tension for years.
Costume making

This step is completely optional. In my opinion, if you want to create a porcelain ball-jointed doll, the costume is what reveals the character of the doll. It gives so much more to it! I've always loved creating costumes for my dolls. Intricate details of embroidery, beads and nicest fabrics tell a story about your doll. The viewer can explore the doll for years and still find something new to admire in the folds of a costume.
Leave a comment if you want to know more about porcelain doll making and I'll try to answer your questions! Also, don't forget to subscribe so you don't miss any future posts from me.